
Slow websites lose visitors. A big chunk of that delay comes from heavy CSS and JavaScript files filled with extra spaces, comments, and long names that browsers do not need to run your site. The fix is simple, free, and works on every project.
Minifying CSS and JavaScript strips out everything browsers ignore and shrinks your files to the smallest possible size, without changing what they do. Done right, your pages download faster, your Core Web Vitals improve, and your search rankings get a small but real lift.
In this hands on guide, you will learn:
- What minification is and how it actually works
- Why minified CSS and JS load faster than original files
- How to minify files manually, online, and with build tools
- How to set it up in WordPress, Webpack, Vite, and Gulp
- Common mistakes that break live websites
- How to test if minification is working
By the end, you will be able to minify any CSS or JavaScript file with confidence, even if you have never used a terminal before.
Table of Contents
Key Takeaways
- Minification removes spaces, line breaks, comments, and long names from your code.
- Smaller files load faster and improve Core Web Vitals like LCP and INP.
- You can minify with online tools, command line tools, or modern build systems.
- Always keep an unminified copy or use source maps for debugging.
- WordPress users can minify in one click with plugins like Autoptimize or LiteSpeed Cache.
- Always test your site after minifying to catch broken scripts early.
Quick Answer: What Does Minifying CSS and JavaScript Mean?
Minifying CSS and JavaScript means removing all unnecessary characters like white space, line breaks, and comments from your code without changing what it does. The result is a smaller file that downloads and runs faster in the browser. Tools like Terser, CSSNano, and esbuild handle this automatically during production builds.
What Is Minification (And What It Is Not)
Minification is the process of compressing source code by removing characters a browser does not need to run it. According to MDN Web Docs, this includes white space, line breaks, comments, and unused code.
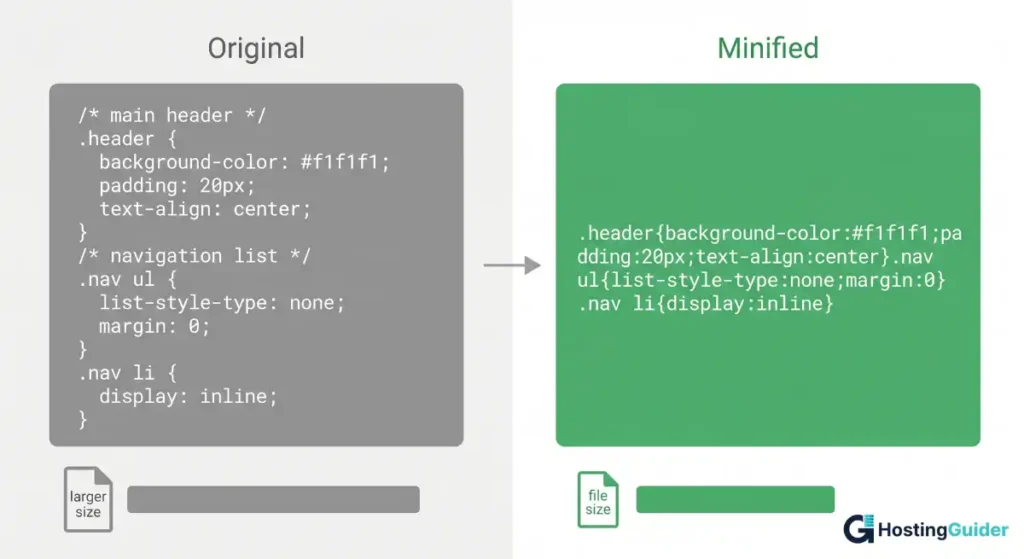
Look at this small CSS snippet:
css
/* Main button styles */
.button {
  background-color: #ff6600;
  padding: 10px 20px;
  border-radius: 4px;
}
After minification it becomes:
css
.button{background-color:#f60;padding:10px 20px;border-radius:4px}Same result, smaller file. Notice the color also got shortened from #ff6600 to #f60. That is a smart shortcut good minifiers do automatically.
Minification is not the same as Gzip or Brotli compression. Compression squeezes the file at the server level before transfer. Minification shrinks the actual code itself. The two stack together, and you should always use both.
Why Minify CSS and JavaScript? Real Performance Benefits
Smaller files mean faster downloads. Faster downloads mean better Core Web Vitals scores, which Google uses as a ranking signal across mobile and desktop search.
Here is what you actually gain:
Lower file size. Most CSS files shrink by 20 to 30 percent. JavaScript can drop by 30 to 60 percent or more, depending on how many comments and long variable names the original file had.
Faster page loads. Fewer bytes means less time on the wire. On a slow mobile connection, this can shave full seconds off your load time.
Better Core Web Vitals. Largest Contentful Paint and Interaction to Next Paint both improve when render blocking CSS and JS files are smaller. Google explains the impact of network payload size in detail on web.dev.
Lower bandwidth costs. If you serve millions of pages a month, smaller files cut your hosting bill noticeably.
Improved SEO. Google has confirmed page speed is a ranking factor, and minification is one of the easiest wins on the list.
Minification vs Compression vs Obfuscation
These three terms get mixed up all the time. Here is the clean breakdown:
| Process | What It Does | Reversible | Main Goal |
|---|---|---|---|
| Minification | Removes spaces, comments, shortens names | Hard but possible | Smaller file size |
| Compression (Gzip, Brotli) | Compresses the file for network transfer | Yes (automatic) | Faster transfer |
| Obfuscation | Scrambles code to make it unreadable | No | Code protection |
You almost always want minification plus compression. Obfuscation is rare and usually only used for licensed scripts you want to protect.
How to Minify CSS Step by Step
You have three main paths. Pick the one that matches your skill level and project.
Method 1: Online Minifier (Easiest for Beginners)
This is perfect for static sites or one off files.
- Open a trusted online minifier in your browser.
- Paste your CSS code into the input box.
- Click the minify button.
- Copy the output and save it as styles.min.css.
- Update your HTML link tag to point to the new file.
Example HTML change:
Before:
html
<link rel='stylesheet' href='styles.css'>After:
html
<link rel='stylesheet' href='styles.min.css'>That is it. Your site now loads a smaller stylesheet.
Method 2: Command Line with CSSNano
If you are comfortable with a terminal, this is faster and easy to repeat. CSSNano is a popular CSS minifier that does much more than strip white space. It merges duplicate rules, shortens colors, and removes dead code. You can read more on the CSSNano docs.
Install Node.js first, then run:
bash
npm install -g cssnano-cli
cssnano styles.css styles.min.css
You now have a fully optimized stylesheet ready for production.
Method 3: Build Tool (Best for Real Projects)
For serious projects, use Vite, Webpack, or Parcel. They minify automatically when you build for production.
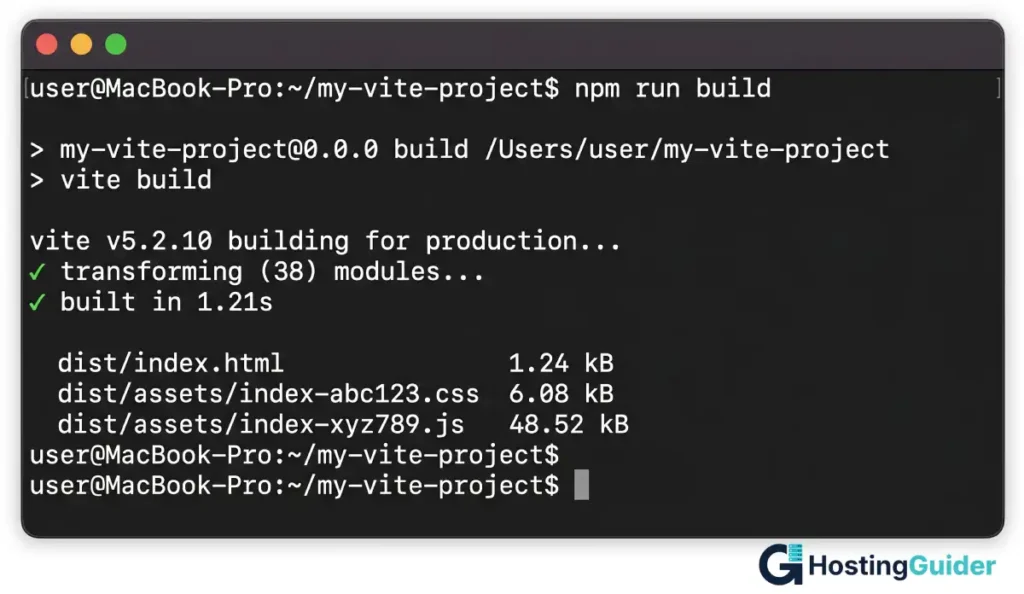
In Vite, just run:
bash
npm run buildVite uses esbuild and Lightning CSS by default and outputs minified files in the dist folder. No config needed.
How to Minify JavaScript Step by Step
The process mirrors CSS minification, but JavaScript can be shortened more aggressively because variable names get renamed too.
Method 1: Online Tool
Use a tool like the Terser playground for quick, no setup minification. Paste your code, click minify, and copy the result. Great for learning what minification actually does.
Method 2: Terser via npm
Terser is the modern standard for JavaScript minification.
bash
npm install -g terser
terser app.js -o app.min.js -c -m
The -c flag enables compression. The -m flag enables mangling, which shortens variable names.
Before:
javascript
function calculateTotalPrice(itemPrice, quantity) {
  const totalPrice = itemPrice * quantity;
  return totalPrice;
}
After Terser with mangling:
javascript
function calculateTotalPrice(a,b){return a*b}The function name stays the same so other code can still call it. The internal variables shrink to single letters. The file is smaller, but the behavior stays identical.
Method 3: Build Tools
Webpack uses Terser by default in production mode. Vite uses esbuild. Both run automatically when you build.
bash
npm run buildYour bundler handles the rest, including chunk splitting and tree shaking.
Best Tools for Minification in 2026
Here is a quick comparison of the most reliable tools you can use right now:
| Tool | Type | Best For |
|---|---|---|
| Terser | JavaScript | Modern JS, ES6 and above |
| UglifyJS | JavaScript | Older ES5 code |
| esbuild | CSS and JS | Speed, used by Vite |
| CSSNano | CSS | Advanced CSS optimization |
| Lightning CSS | CSS | Fast Rust based minifier |
| HTMLMinifier | HTML | HTML files and templates |
| Autoptimize | WordPress | One click setup |
Terser and esbuild are the safest defaults for most projects today.
Minifying CSS and JS in WordPress
WordPress users do not need to touch any code. Plugins handle everything.
Top options to consider:
- Autoptimize combines and minifies CSS, JS, and HTML in a few clicks.
- LiteSpeed Cache does minification plus caching if you are on LiteSpeed hosting.
- WP Rocket is a premium plugin with smart defaults that work for most themes.
- W3 Total Cache is a powerful free option with deeper settings.
Setup is simple. Install the plugin, activate it, and turn on the minify CSS and minify JavaScript options. Always test your site after enabling. Some themes break with aggressive JavaScript combination, so toggle settings one at a time and clear your cache between tests.
Setting Up Minification in Webpack and Vite
For developers building modern apps, your bundler does the heavy lifting.
Vite Configuration
Vite minifies by default in production. No config is needed for most cases. If you want to tweak it, edit vite.config.js:
javascript
export default {
  build: {
    minify: 'terser',
    cssMinify: 'lightningcss'
  }
}
Webpack Configuration
Webpack 5 ships with Terser built in. Just set the mode to production:
javascript
module.exports = {
  mode: 'production'
}
For CSS, add CssMinimizerPlugin:
bash
npm install css-minimizer-webpack-plugin --save-devThen in your config:
javascript
const CssMinimizerPlugin = require('css-minimizer-webpack-plugin');

module.exports = {
  optimization: {
    minimizer: [new CssMinimizerPlugin()]
  }
}
Gulp Setup for Older Projects
bash
npm install gulp-clean-css gulp-terser --save-devjavascript
const gulp = require('gulp');
const cleanCSS = require('gulp-clean-css');
const terser = require('gulp-terser');

gulp.task('css', () =>
  gulp.src('src/css/*.css')
    .pipe(cleanCSS())
    .pipe(gulp.dest('dist/css'))
);

gulp.task('js', () =>
  gulp.src('src/js/*.js')
    .pipe(terser())
    .pipe(gulp.dest('dist/js'))
);
Run gulp css or gulp js, and your files come out minified into the dist folder.
Source Maps: How to Debug Minified Code
Minified files are unreadable. If something breaks in production, you cannot tell which line caused the issue. Source maps fix that.
A source map is a separate file ending in .map that links minified code back to your original source. Browsers read it during debugging so you see your real code in DevTools, even though the live file stays minified.
To generate one with Terser:
bash
terser app.js -o app.min.js --source-mapMost build tools generate source maps automatically when you set the right mode. Always upload them with your production build for proper error tracking with tools like Sentry.
Common Minification Mistakes to Avoid
Even small slips can break a live site. Watch out for these traps:
Minifying already minified files. Some plugins re minify CDN files, which can break libraries like jQuery. Always exclude vendor files.
Forgetting source maps. Without them, debugging production errors becomes painful and slow.
Combining incompatible scripts. Some plugins combine all JS into one file. If two scripts conflict, the whole site can break. Toggle this feature carefully.
Not testing after minification. Always check key pages and user flows after enabling minification. Forms, sliders, and animations are common breakage points.
Ignoring inline scripts. Inline JavaScript inside HTML often gets missed. Use HTML minifiers or a build pipeline that handles inline code too.
Skipping caching headers. Minification helps, but proper cache control headers compound the speed benefit. Pair them for best results.
How to Test if Minification Is Actually Working
Run these checks after every change.
- Open your site in Chrome.
- Right click the page and choose View Page Source.
- Click your CSS or JS file link.
- If you see one giant line of code with no spacing, minification is working.
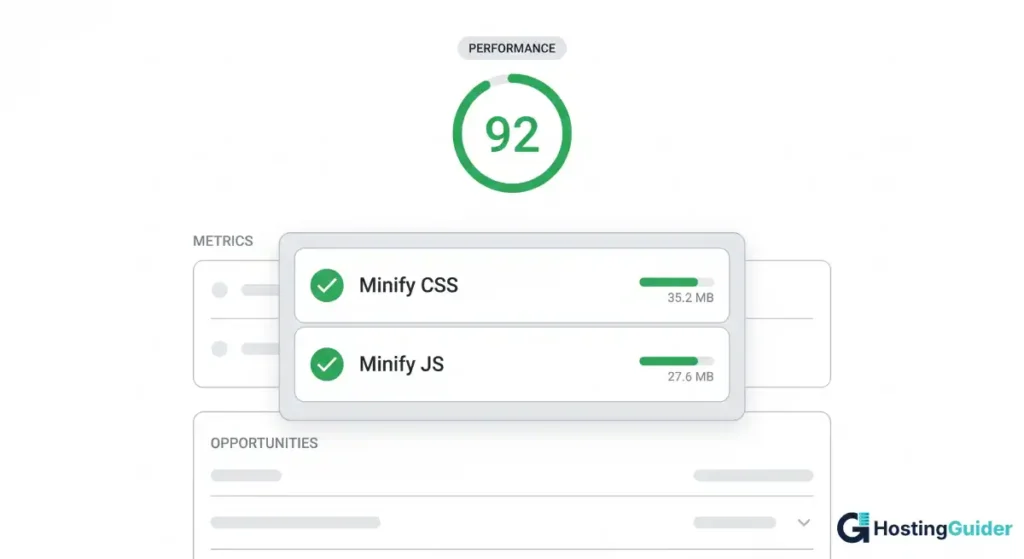
You can also run your site through Google PageSpeed Insights. It flags any unminified files in the audit. A clean report means you are good to go.
For deeper analysis, try GTmetrix or WebPageTest. They show file size before and after compression and highlight more savings opportunities.
A Practical Tip for Building Lasting Habits
If you build sites often, set up minification once in your build pipeline. Do not minify file by file every time you ship. Vite, Webpack, and Parcel all handle it automatically when you run a production build. Set it once, forget it, and ship faster sites every release.
A small interactive minifier or savings calculator can also help you see the gains before committing to changes on a live project.
Frequently Asked Questions
Does minification actually improve SEO?
Yes. Minified CSS and JavaScript reduce page load time, which improves Core Web Vitals. Google uses Core Web Vitals as a ranking signal for mobile and desktop search. Smaller files also save crawl budget on large sites, helping search engines index more of your pages.
Is minification the same as Gzip compression?
No. Minification rewrites the source code itself to remove unnecessary characters. Gzip compresses the final file before sending it over the network. They work together for the best speed gains. Use both, not just one.
Can minification break my website?
Yes, in some cases. Aggressive JavaScript minification or combining many scripts can cause conflicts. Always test on a staging site first. Keep an unminified backup or use source maps so you can debug if something fails after deployment.
How much faster will my site load after minifying?
It depends on your file sizes. CSS files typically shrink by 20 to 30 percent. JavaScript can drop by 30 to 60 percent. The actual speed gain depends on your network, hosting, and how render blocking your scripts are.
Should I minify HTML too?
Yes, when possible. HTML minification removes white space and comments from your pages. It saves a smaller percentage than CSS or JS, but on high traffic sites the savings add up. Tools like HTMLMinifier or build plugins can handle it automatically.
Do I need to minify if I use a CDN like Cloudflare?
Cloudflare and similar CDNs offer auto minification as a feature. You can rely on it for basic needs, but for best results, also minify at build time. CDN minification is a safety net, not your main strategy.
What is the difference between Terser and UglifyJS?
Terser supports modern JavaScript including arrow functions, classes, async await, and other ES6 plus features. UglifyJS only supports ES5. For any modern project, Terser is the right choice. UglifyJS is mostly used for legacy code today.
Final Thoughts
Minifying CSS and JavaScript is one of the easiest performance wins you can ship. It costs almost nothing to set up, works on any tech stack, and pays off every time someone visits your site. Start with one tool that fits your workflow, test on a staging site, and roll it out with confidence.
Once minification is in place, layer on Gzip or Brotli compression, set proper cache headers, and watch your Core Web Vitals scores climb. Small steps, big speed gains, every single deploy.